Gate Installation
The part most people get wrong. Gates are where pool barriers fail inspection - so this one is worth reading twice.
Choose your latch first
This decision changes your measurements, so make it before you order. Both use MagnaLatch hardware.
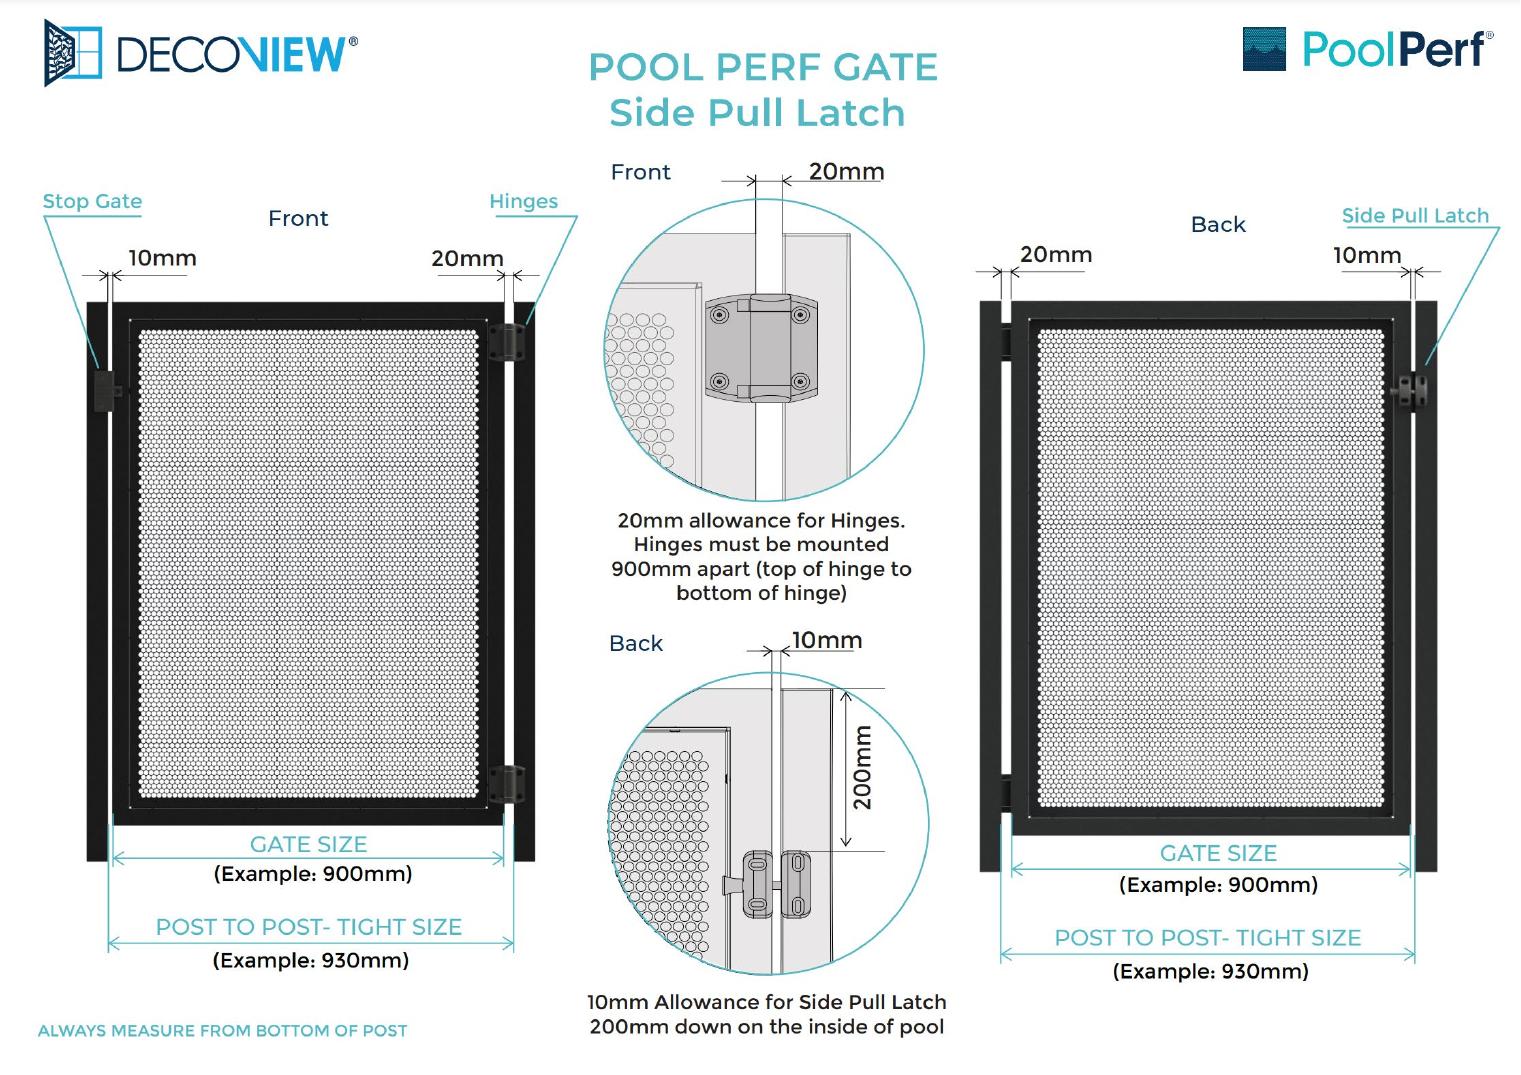
Side Pull Latch
Mounted on the side of the gate, on the pool side, set down from the top so it can’t be reached over the gate.
- Latch allowance
- 10mm
- Latch position
- 200mm down, on the inside (pool side)
- Hinge allowance
- 20mm
- Stop gate side
- 10mm
- Worked example
- 900mm gate in a 930mm post-to-post opening
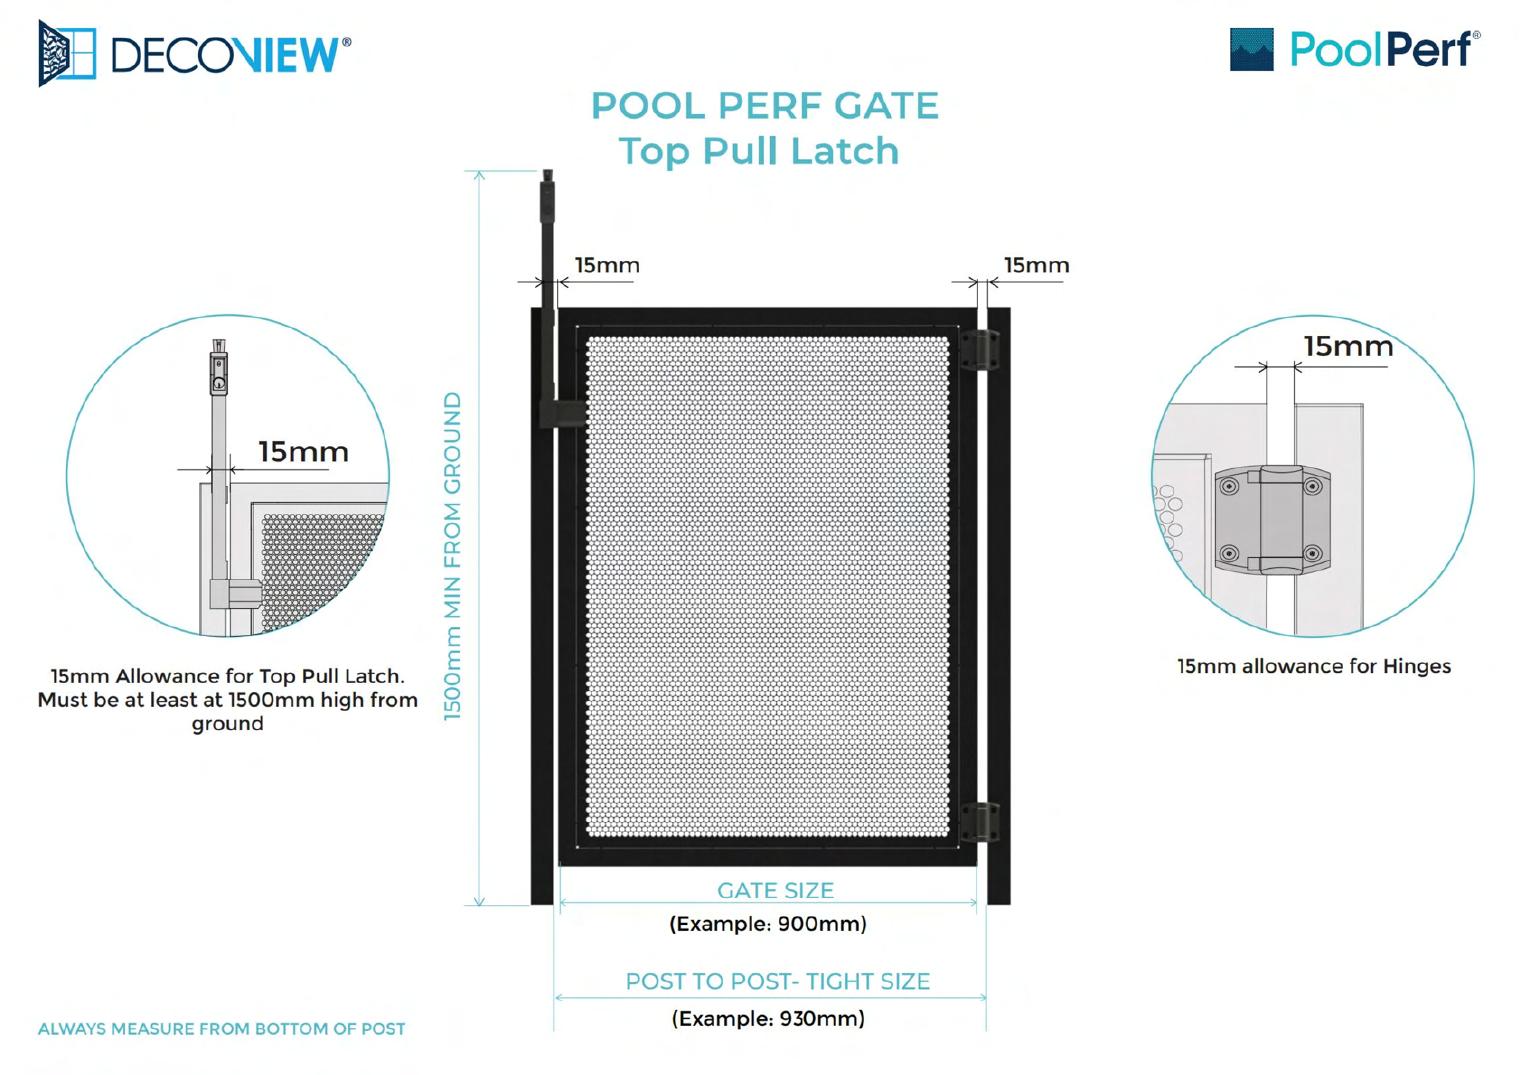
Top Pull Latch
Mounted on top of the gate on a raised post, so the release is high above the ground and out of reach.
- Latch allowance
- 15mm
- Latch height
- Minimum 1500mm from ground
- Hinge allowance
- 15mm
- Worked example
- 900mm gate in a 930mm post-to-post opening
Step by step
Decide on your latch type
Side pull or top pull. Do this before you measure or order - the hinge and latch allowances are different for each.
Measure the opening
Measure the tight post-to-post distance from the bottom of the posts, then subtract the hinge and latch allowances for your latch type. A 930mm opening gives a 900mm gate.
Set your gate posts
Gate posts take more load than fence posts - they carry the weight and the repeated slam of a self-closing gate. Set them properly and let concrete or grout cure fully before hanging anything.
Mount the hinges
Fit the self-closing hinges 900mm apart, measured from the top of the upper hinge to the bottom of the lower hinge. Getting this spacing right is what makes the gate close reliably rather than sagging.
Hang the gate
Hang it so it swings outwards, away from the pool. Check it swings freely and doesn’t foul the stop or the ground at any point in its travel.
Fit the latch
Side pull: 200mm down on the pool side. Top pull: at least 1500mm above ground. Fit the striker so it engages cleanly.
Test it properly
Open the gate to several different positions - including barely ajar - and let go each time. It must swing shut and latch on its own every single time. If it latches from wide open but not from 100mm ajar, it isn’t finished.
Watch it done
The complete gate installation, start to finish.
Complete Bracket Gate Installation
Panels done? Here’s the gate, start to finish.
A word about the hardware
Gates ship with MagnaLatch latching hardware and self-closing hinges. These are covered by their own manufacturers’ warranties rather than the Pool Perf® 10-year product warranty - worth knowing if you ever need to make a claim.
If you’re replacing hardware on an existing gate rather than installing a new one, check what you’re buying is rated for pool gate use. Standard gate hardware is not.
Decided it’s not for you?
No problem at all. If installing your own pool fence isn’t for you, we have many trusted and expert Trade Partners around Australia who are more than willing to lend a hand - licensed local installers who do this every week and handle the compliance side for you.
Want the gate done for you?
Plenty of people install the fence themselves and have a professional do the gate. That’s a perfectly sensible split.
The manufacturer's drawings for both gate types: components, specifications, post install and panel install, straight from the manufacturer’s manual. Read them on screen or take just that section with you.
Talk it through with a Pool Perf® specialist
Free, no obligation. Measuring, fixing method, gates, custom sizes and colours. Bring your numbers and we’ll work through them with you before you order.
Get Your Buyers Guide Now
- Current pricing, plainly set out
- The full design and colour range
- Channel Fit vs Bracket Fit, compared
- Measuring, gates and compliance