How it works
Get the measuring right
and the rest is a breeze.
Five steps from an empty pool surround to a compliant fence. Only one of them is worth slowing down for - and there is a calculator below to help you get it exactly right.
Work out my panel sizeWhat size panel do I order?
Measure the tight distance from post to post, at the bottom of the posts. Enter it here and we’ll do the subtraction for you.
Your openings
Before you order, three things
- Measure from the bottom of the posts. Posts lean. The gap at the top is not the gap at the bottom, and the bottom is the one that has to fit.
- Measure every opening separately. They are almost never identical, even when they look it. One measurement copied across a whole run is the most common way an order goes wrong.
- Made-to-measure panels can’t be returned for a sizing error. They are built to the numbers you give us. Check each one twice.
Not completely certain? Send your numbers through before you order - we would far rather check them with you first. or ask an expert.
Panels are 1200mm tall as standard and can be made to 1500mm. Maximum panel length is 3000mm for both systems - wider openings need an extra post. Raked panels for sloping ground are measured differently; the guides below cover it.
Five steps, start to finish
Most of the work is in the first three. Once the panels turn up, it is fixing, not building.
-
1
Plan the run
Work out where the barrier goes, where the gate goes, and what the ground does along the way. Flat runs are simple. Falls and steps need raked panels - still very doable, just worth knowing before you measure.
-
2
Choose Channel Fit or Bracket Fit
Channel Fit gives the cleanest look, with no visible brackets and no gap at the posts. Bracket Fit is more forgiving, because panels can be trimmed on site. Full comparison below.
-
3
Measure post to post, from the bottom
This is where DIY orders go wrong, so it is worth slowing right down. Measure the tight post-to-post distance at the bottom of the posts, then take off the allowance for your system. The calculator above does that part for you.
-
4
Order your panels
Pick your design and colour, give us your sizes, and we manufacture to those measurements. Assembly is free - panels arrive built, wrapped in Geofabric, sealed and palletised.
-
5
Install
Set your posts, fix your channels or brackets, fit the panels, hang the gate. Follow the guide for your fixing method and post type, and you are done.
Channel Fit or Bracket Fit?
Both are designed for self-install. The honest difference is how much room for error you want.
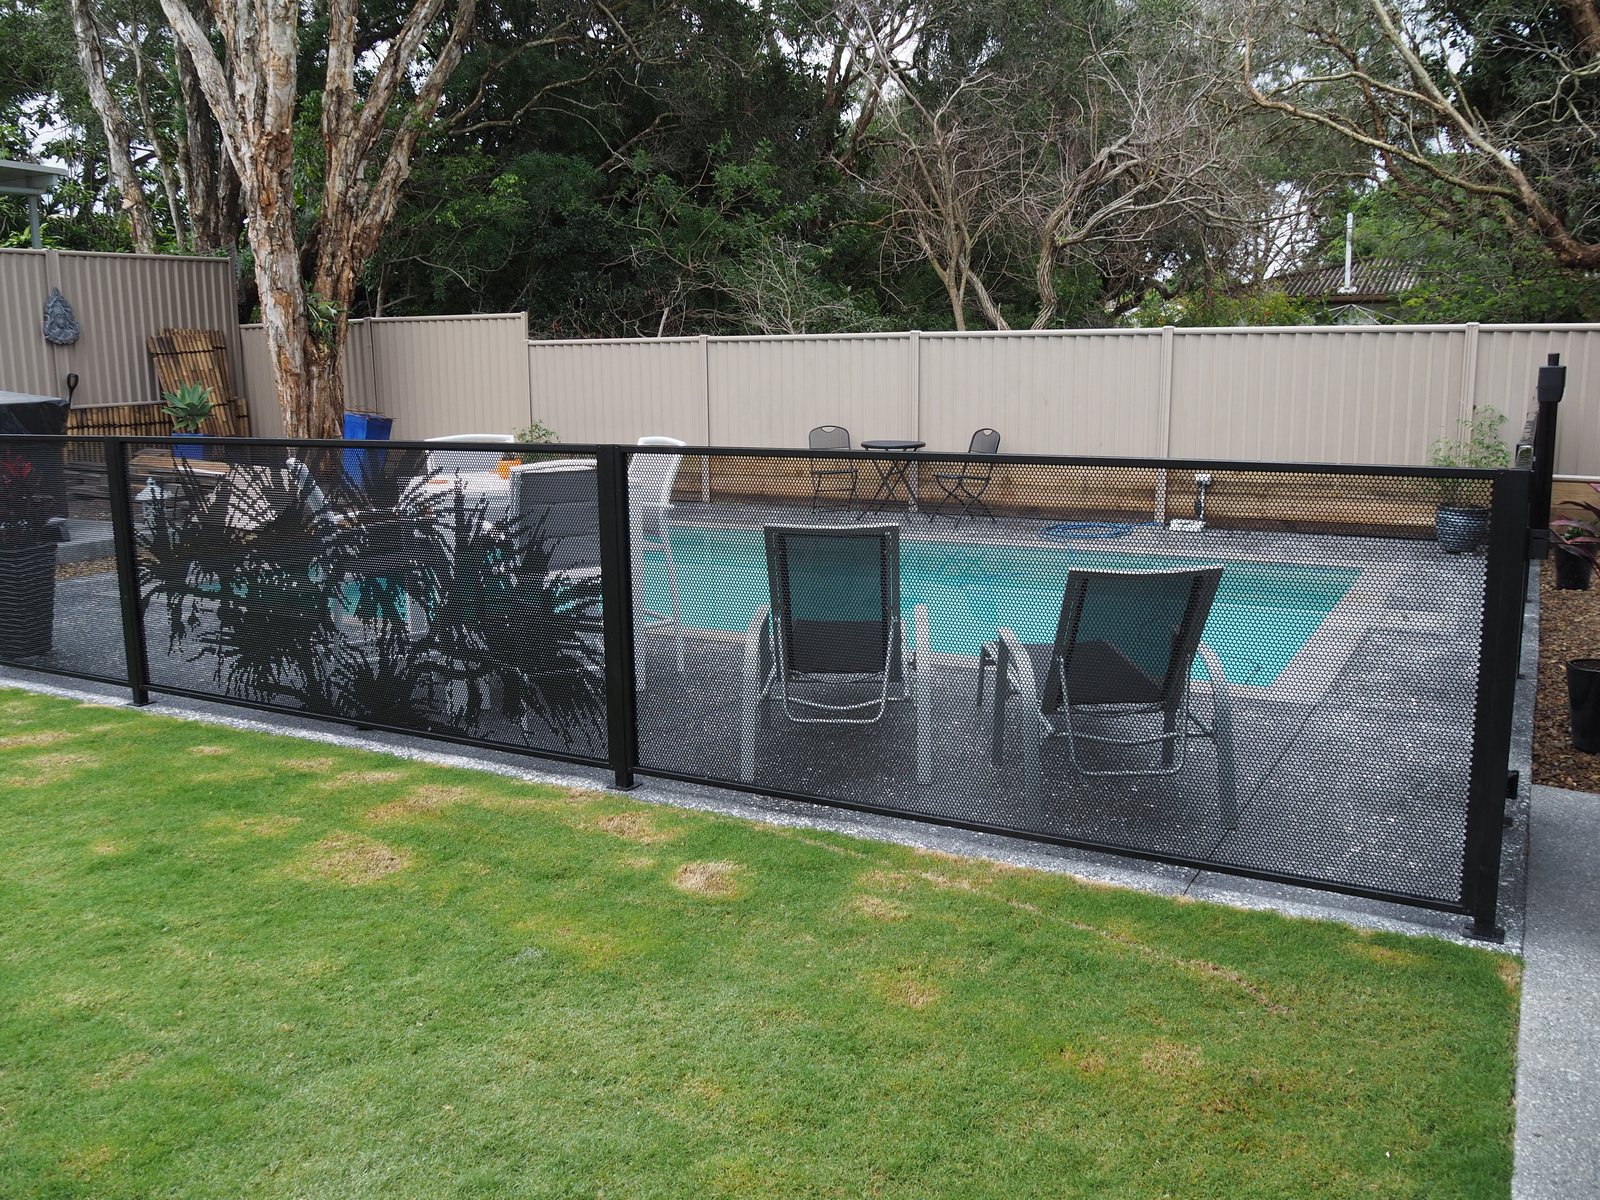
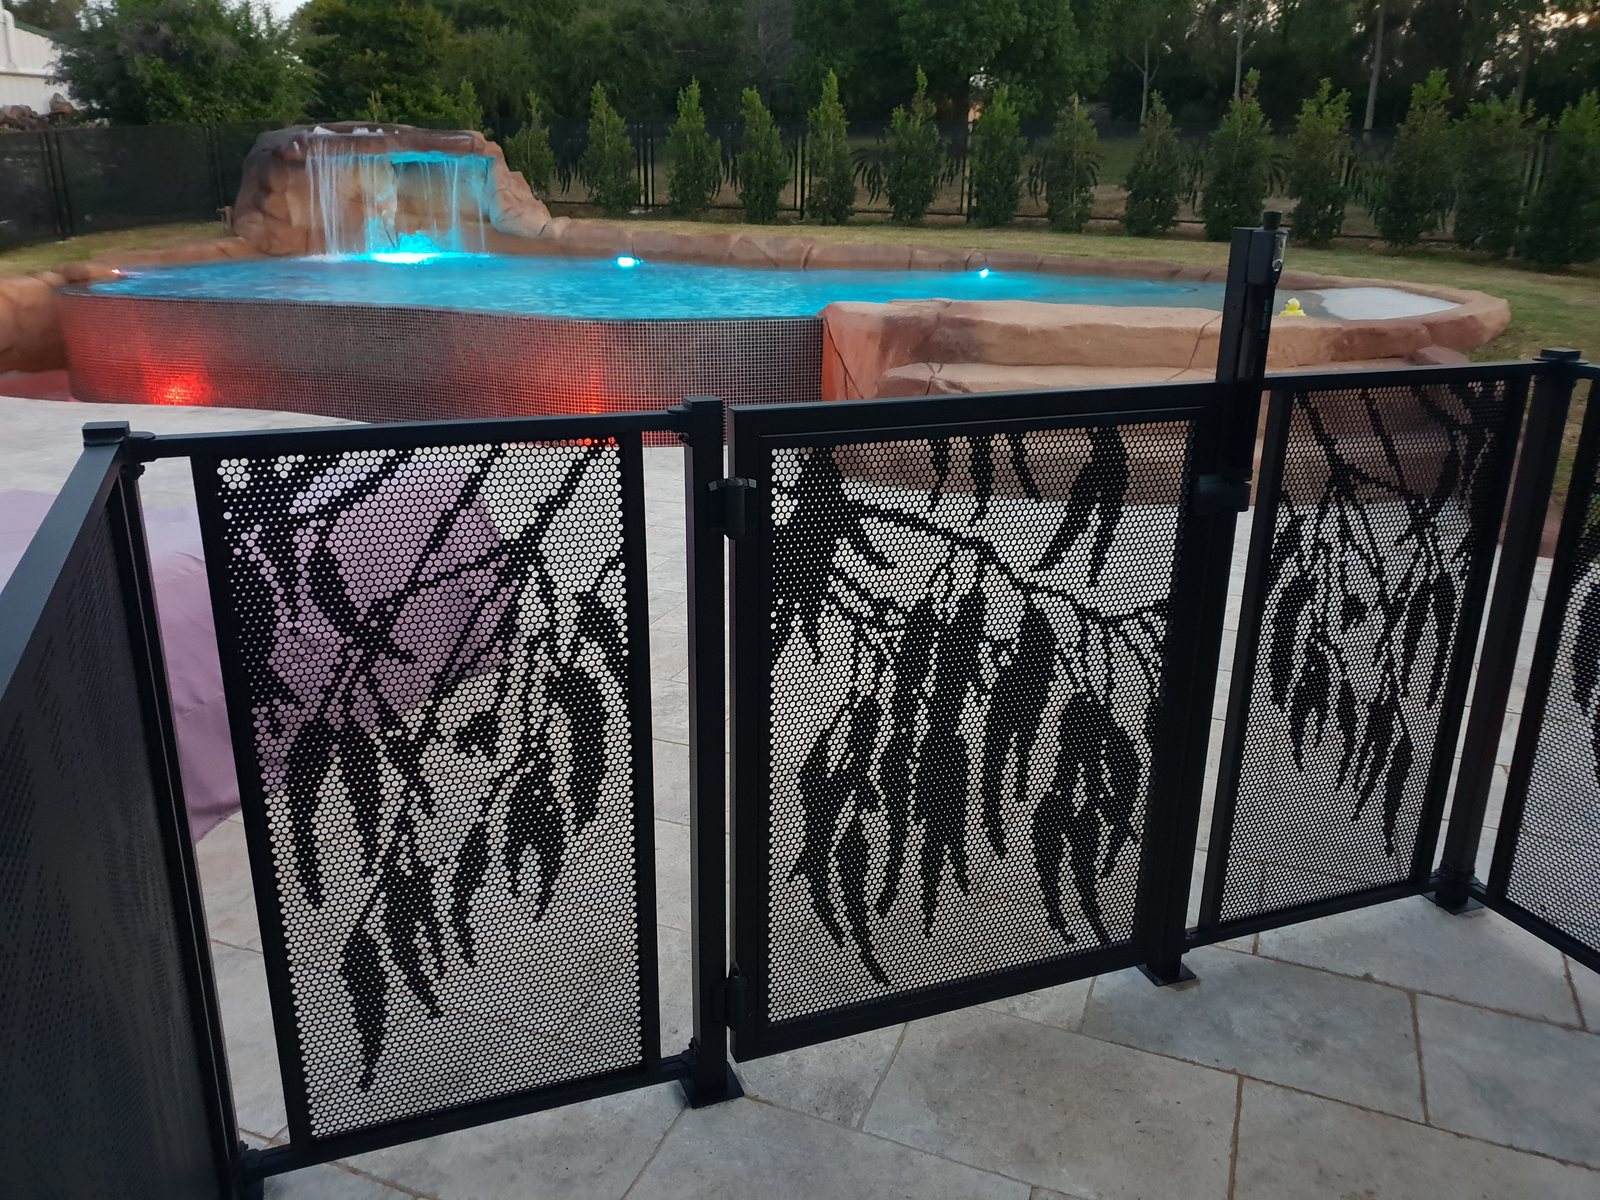
| Channel Fit | Bracket Fit | |
|---|---|---|
| The look | Zero gap, no visible brackets. Cleanest architectural line. | Designed 80mm gap either side of the panel. |
| How it fixes | Channels screw to the post; the panel slides in. | Fish-mouth shroud brackets clamp onto the panel frame. |
| Make-size formula | Post-to-post − 14mm (7mm each side into the channel) | Post-to-post − 4mm (4mm tolerance for brackets) |
| Trim on site? | No - panels are made to size. | Yes - the frame can be cut to suit. |
| Best for | New posts, regular spacing, the best possible finish. | Existing posts, irregular spacing, or if you’d rather have wiggle room. |
| Max panel length | 3000mm - both systems | |
| Panel height | 1200mm standard, custom to 1500mm | |
The measuring guides
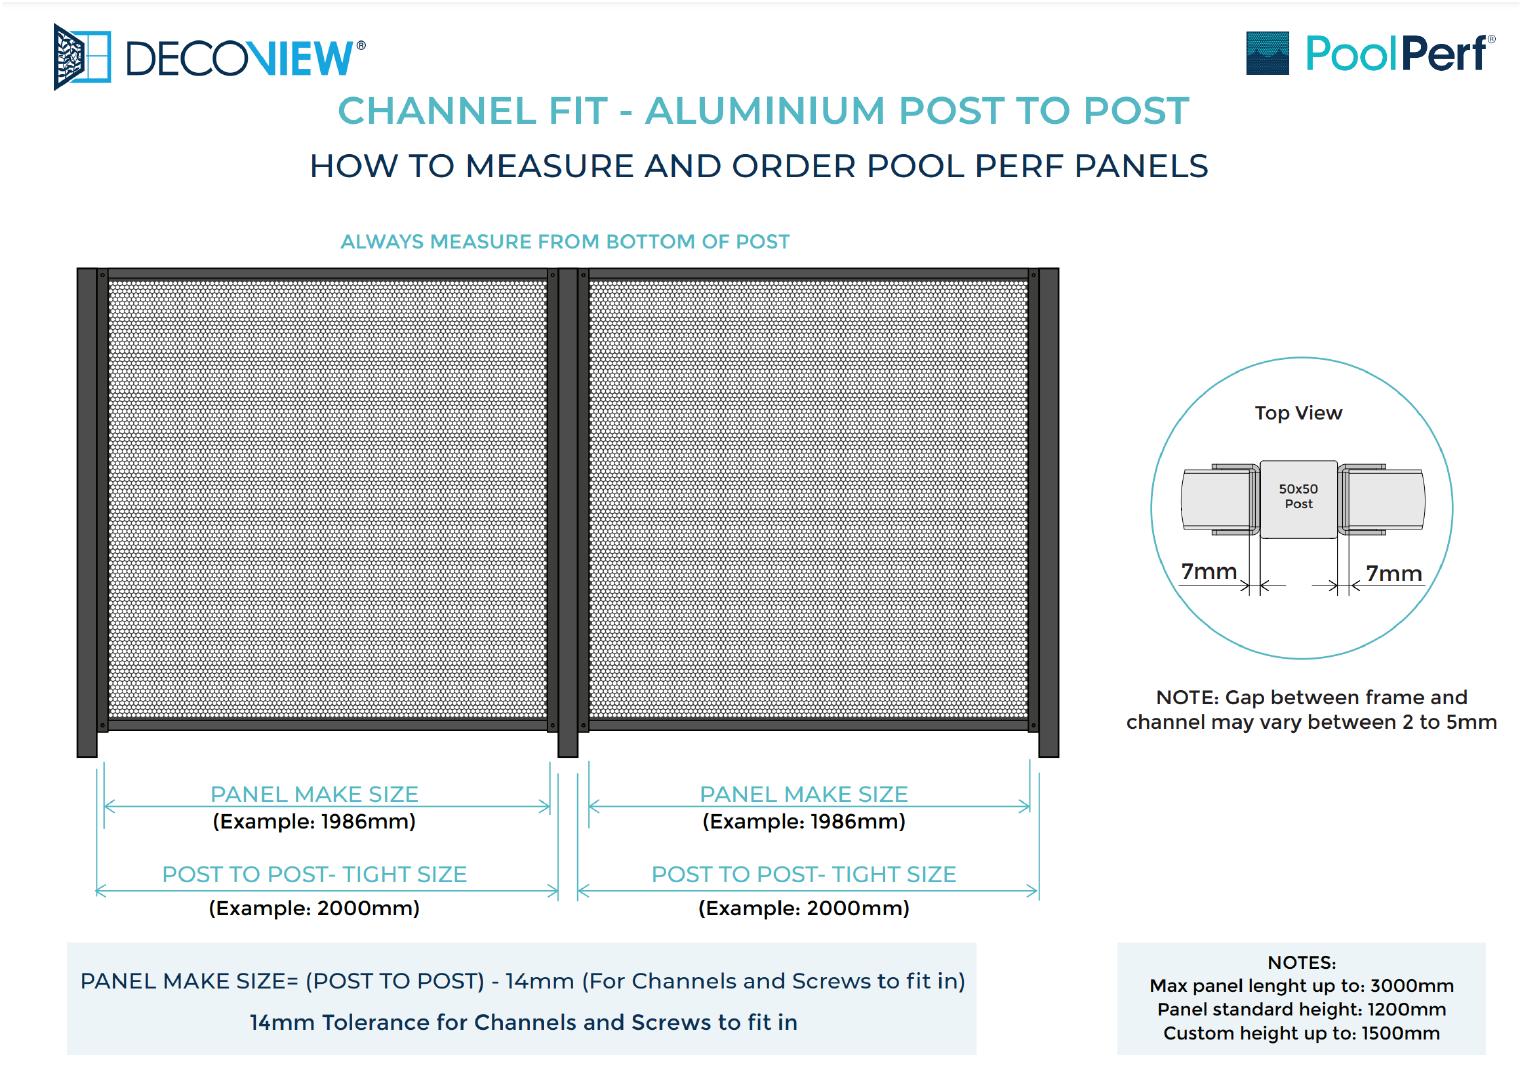
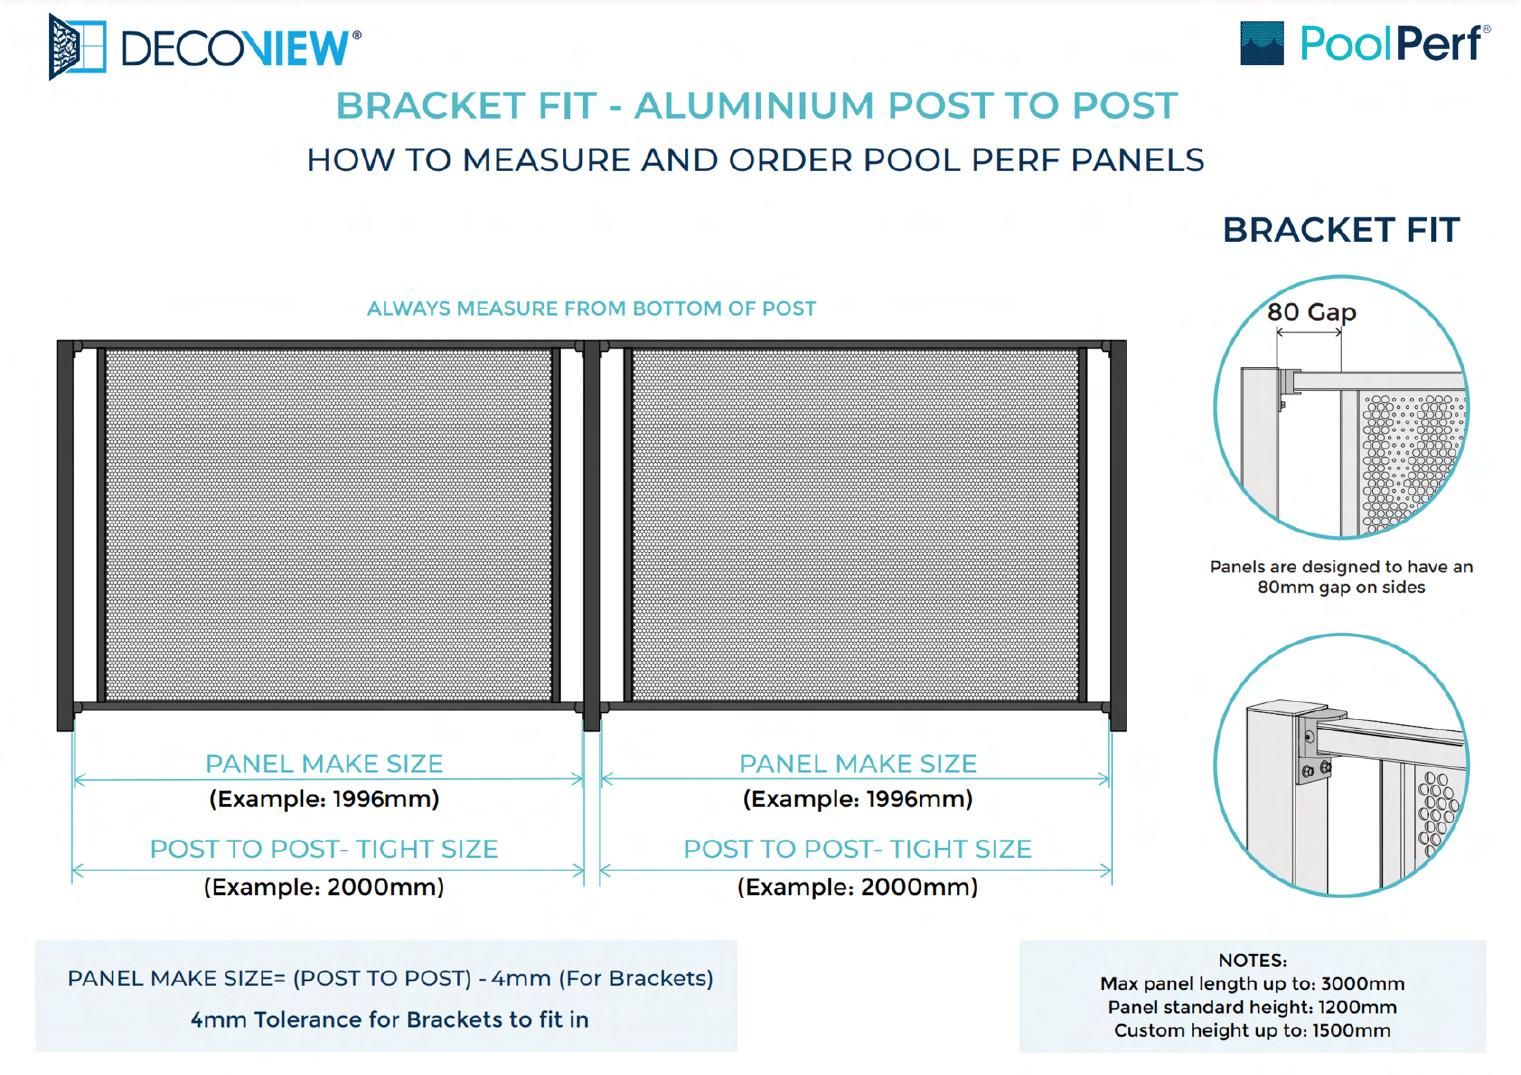
Both open full size for zooming on a phone, or download as a PDF to take outside with you.
What turns up on the truck
Panels arrive fully assembled - frame tabbed, slotted and squared, infill already riveted right around it. Each one is individually wrapped in Geofabric so it doesn’t get scratched in transit; posts, channels and fixings are sealed in protective sleeves; the lot comes palletised.
Be aware that additional HIAB charges can apply if your site has access or unloading issues, and that we recommend you or a nominee are on site to receive the delivery.
Unpacking your order - how it’s wrapped and what to check.
Decided it’s not for you?
No problem at all. If installing your own pool fence isn’t for you, we have many trusted and expert Trade Partners around Australia who are more than willing to lend a hand - licensed local installers who do this every week and handle the compliance side for you.
Measured up and ready?
Order your panels and we’ll build them to your sizes.
Talk it through with a Pool Perf® specialist
Free, no obligation. Measuring, fixing method, gates, custom sizes and colours. Bring your numbers and we’ll work through them with you before you order.
Get Your Buyers Guide Now
- Current pricing, plainly set out
- The full design and colour range
- Channel Fit vs Bracket Fit, compared
- Measuring, gates and compliance